


Essential Preparations for Installing a Center Stand on Your Honda NC750X
Preparing for a center stand installation on the Honda NC750X begins with gathering all necessary tools. This typically includes wrenches, sockets, and possibly a spring puller; however, confirming the compatibility of the center stand parts with your specific NC750X model is critical to avoid issues during installation. Thorough research ensures the parts fit correctly, avoiding unnecessary delays.
Next, set up a safe workspace. Clear the area to prevent tripping hazards and ensure good lighting. Remember that the Honda NC750X maintenance involves handling the motorcycle in a stable and secure manner. Using a bike lift or secure side stand during the preparation phase helps prevent accidents.
Inspect your NC750X for any existing damage or wear in the mounting areas. This proactive step can reveal potential challenges before installation begins. For example, corrosion or mounting point deformation might require addressing before attaching the center stand.
By approaching the process with attention to tool readiness, safety precautions, and compatibility, you set the foundation for a smoother DIY motorcycle upgrade and effective center stand installation.
Also to discover : Proven Strategies to Minimize Handlebar Vibration on Your Suzuki V-Strom 650 for a More Comfortable Ride
Essential Preparations for Installing a Center Stand on Your Honda NC750X
Before beginning your center stand installation, a thorough preparation phase is crucial for a smooth and safe process. Start by gathering the correct tools and a center stand specifically compatible with the Honda NC750X. Using parts not designed for your model can lead to fitment issues or safety hazards. Essential tools typically include wrenches, screwdrivers, pliers, and possibly a torque wrench.
Safety should be your priority. Clear an uncluttered workspace with good lighting and stable flooring. Equip yourself with protective gloves and eyewear to prevent injuries during installation. Ensure the motorcycle is clean, making it easier to inspect mounting points and spot any potential complications.
Next, closely inspect your Honda NC750X for signs of wear or damage around the mounting points where the center stand will attach. Confirm the stand’s fitment design aligns with your bike’s frame. This inspection helps anticipate any challenges such as rust, damaged bolts, or frame modifications that could affect installation.
By methodically preparing your tools, workspace, and motorcycle, you’re setting the foundation for a successful and stress-free DIY motorcycle upgrade. This approach minimizes delays and ensures your new center stand functions safely and reliably.
Step-by-Step Center Stand Installation Process
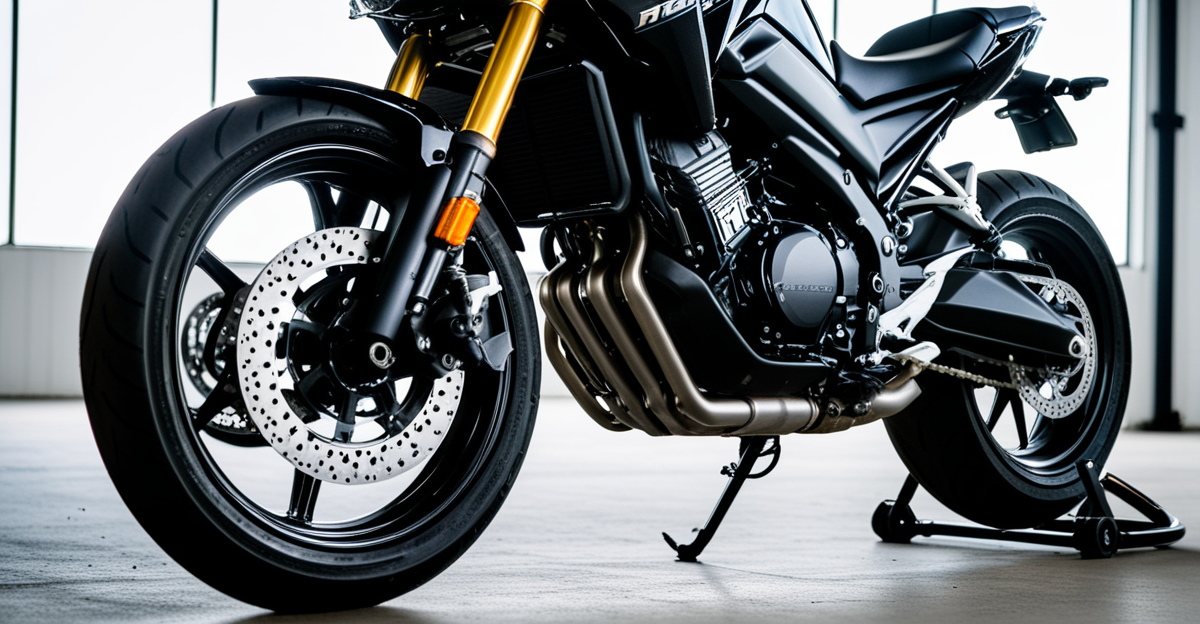
Installing the center stand on your Honda NC750X begins with lifting and securing the motorcycle safely. Using a bike lift or sturdy side stand ensures the bike remains stable throughout the process, minimizing risks in this crucial step. Proper support is essential for effective Honda NC750X maintenance.
Next, locate the precise mounting points for the center stand. These areas often have pre-drilled holes or reinforced brackets designed to accommodate the stand. Before proceeding, clean these mounting areas to remove dirt or rust, which ensures a snug fit during the center stand installation.
When positioning the stand, align the pivot holes accurately with the frame’s mounting points. Insert the appropriate bolts or pins, then fasten them securely. Pay attention to the manufacturer’s instructions to avoid cross-threading or overtightening. Throughout the process, keep the stand in the deployed position momentarily to check for smooth movement and proper alignment.
This step-by-step approach, when combined with your prior preparations, forms the backbone of successful DIY motorcycle upgrades on your NC750X. Precise positioning and careful fastening are key to a functional and durable center stand installation.
Step-by-Step Center Stand Installation Process
Installing a center stand on your Honda NC750X requires careful attention to ensure safety and proper fitment. First, lifting and securing the bike safely is essential. Use a stable lift or secure the motorcycle on its side stand while keeping it steady to prevent tipping.
Next, locate and prepare the mounting points. These are usually on the lower frame where the center stand attaches. Before installation, clean these areas to remove dirt or corrosion that might impede secure attachment. Checking the alignment of holes and mounting brackets prevents issues during assembly.
When positioning the center stand, align the stand’s pivot points with the mounting brackets carefully. Fastening requires proper torque to ensure the stand functions smoothly without loosening but avoid overtightening to prevent damage. Maintaining correct alignment is critical, as misalignment can cause difficulty deploying the stand or affect stability.
Throughout the NC750X installation guide, stepwise procedures emphasize safety and precision. The process may involve compressing springs to secure the stand, so consider using appropriate spring pullers to ease this task safely. Following these motorcycle DIY instructions helps guarantee a secure, effective center stand installation, enhancing both stability and convenience during Honda NC750X maintenance.
Torque Specifications, Adjustments, and Final Checks
After positioning and securing the center stand during your Honda NC750X maintenance, applying the correct torque settings is vital. The center stand torque specs recommended by the manufacturer ensure bolts are tightened sufficiently to hold the stand firmly without damaging threads or deforming mount points. Using a calibrated torque wrench, tighten all fasteners to the specified values for your NC750X model.
Once torque is applied, test the stand’s movement. It should deploy and retract smoothly without excessive force or catching. This confirms the alignment and adjustment are correct. If the stand feels stiff or loose, re-examine mounting bolts and pivot points. Small adjustments may be necessary to guarantee stability.
Final checks include inspecting for proper clearances around the stand, ensuring it doesn’t interfere with exhaust pipes, frame parts, or wheels. Tight fittings prevent noise and wear during riding. Secure fittings also minimize vibration and increase longevity, key aspects of effective DIY motorcycle upgrades.
Performing these torque and adjustment steps carefully completes the center stand installation, contributing to safer, more reliable Honda NC750X maintenance and confident use on the road.
Essential Preparations for Installing a Center Stand on Your Honda NC750X
To ensure a successful center stand installation on your Honda NC750X, begin by gathering all necessary tools and verifying that the replacement stand is fully compatible with your bike model. Having the correct wrench sizes, spring pullers, and torque wrenches ready reduces installation time and frustration. Confirm that the center stand parts match your NC750X frame specifications to avoid fitment issues, which are common sources of delays in DIY motorcycle upgrades.
Next, review safety precautions thoroughly. Choose a clean, well-lit, and level workspace that allows you to maneuver the motorcycle easily during Honda NC750X maintenance. Wearing protective gloves and eye protection is advisable. Stabilize your motorcycle with a lift or side stand to maintain balance while working.
Lastly, inspect your bike for any existing wear or damage at the mounting points where the center stand will attach. Pay particular attention to corrosion or bent brackets, as these can compromise installation integrity. Address any issues before proceeding, ensuring the frame is ready for a secure attachment. Proper preparation at this stage streamlines the process and contributes to a reliable, long-lasting center stand setup.
Essential Preparations for Installing a Center Stand on Your Honda NC750X
Before diving into the center stand installation, ensure you have all the necessary tools ready. Typically, you will need wrenches, sockets, and a spring puller specifically suited for the Honda NC750X. Confirming that your center stand parts are compatible with your bike model is essential to avoid misfit or damage, a common hurdle in DIY motorcycle upgrades.
Safety comes next. Choose a flat, well-lit workspace free from obstacles. Wear protective gloves and eye protection to safeguard against injuries during Honda NC750X maintenance. Stabilize your motorcycle using a bike lift or side stand to keep it steady when attaching the stand.
Inspect the mounting points for signs of corrosion, rust, or deformation. Such issues can complicate installation and reduce stability. If found, clean or repair these areas before proceeding. This preparation helps ensure the center stand installation goes smoothly, reducing risks and enhancing the durability of your upgrade.
Essential Preparations for Installing a Center Stand on Your Honda NC750X
Successful center stand installation begins with assembling the right tools and confirming part compatibility. Essential tools include socket wrenches, combination wrenches, torque wrenches, and a spring puller designed for motorcycle use. Ensuring your center stand parts specifically fit the Honda NC750X frame reduces the risk of improper mounting or damage during DIY motorcycle upgrades.
Safety and workspace setup are equally vital. Choose a well-lit, flat surface free of obstacles to prevent accidents during Honda NC750X maintenance. Use protective gloves and eyewear for added safety. Securing your motorcycle with a lift or sturdy side stand stabilizes it during work, minimizing tipping risks.
Inspecting your NC750X for potential difficulties is critical before installation. Focus on mounting points for signs of rust, corrosion, or deformation. These issues can compromise the stand’s firmness after installation. Cleaning and treating these areas in advance prevents future complications. Assess if existing bolts and brackets match the new center stand’s design to avoid component mismatch, a common obstacle in center stand installation tasks.
Through thorough preparation of tools, safety measures, and compatibility checks, you set the stage for an efficient and secure Honda NC750X maintenance upgrade.
Essential Preparations for Installing a Center Stand on Your Honda NC750X
For a successful center stand installation, gathering the right tools and parts is crucial. Ensure you have wrenches that fit your NC750X’s bolts, a spring puller to ease spring attachment, and a torque wrench for precise tightening. Confirm that the center stand parts are compatible with your Honda NC750X model. Using incorrect components can cause misalignment or safety issues, hampering your DIY motorcycle upgrades and complicating Honda NC750X maintenance.
Safety cannot be overlooked. Prepare a clean, well-lit work area with stable flooring to avoid slips or accidents. Protective gloves and eye protection should be worn during the installation phase. Stabilize your motorcycle using a side stand or a reliable lift to keep it steady.
Before installation, conduct a detailed inspection of the NC750X’s mounting points. Look for corrosion, rust, or frame damage which can interfere with the stand’s attachment and stability. Cleaning or repairing these mounting areas beforehand prevents potential problems, ensuring a smooth process. Proper preparation at this stage not only saves time but strengthens the dependability of your new center stand, enhancing your overall Honda NC750X maintenance routine.
Essential Preparations for Installing a Center Stand on Your Honda NC750X
Gathering the right tools and confirming part compatibility are critical first steps for a successful center stand installation. Essential tools include socket wrenches, torque wrenches, and a spring puller designed for motorcycle use. Using a stand specifically designed for the Honda NC750X ensures proper fitment and minimizes installation challenges common in DIY motorcycle upgrades.
Safety precautions cannot be overlooked during Honda NC750X maintenance. Prepare a flat, well-lit workspace free from clutter to prevent accidents. Wear protective gloves and eyewear, and stabilize your motorcycle using a secure lift or side stand to keep the bike steady while you work. This setup reduces tipping risks and makes handling easier.
Inspecting the mounting points on your NC750X is vital. Look closely for corrosion, rust, or deformation that could interfere with the center stand installation. Address any wear by cleaning or repairing these areas to ensure solid attachment. Also, verify that existing bolts and brackets match those required by your center stand parts to avoid mismatches that might compromise stability.
By carefully combining tool readiness, safety measures, and thorough bike inspection, you lay a strong foundation for efficient and secure Honda NC750X maintenance and upgrades.