


Step-by-Step Car Battery Replacement Guide in the UK
Replacing your car battery yourself can save time and money, but it requires careful attention to detail. This DIY car battery replacement UK guide provides clear, step-by-step instructions to help you handle each phase safely and effectively.
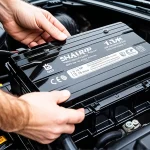
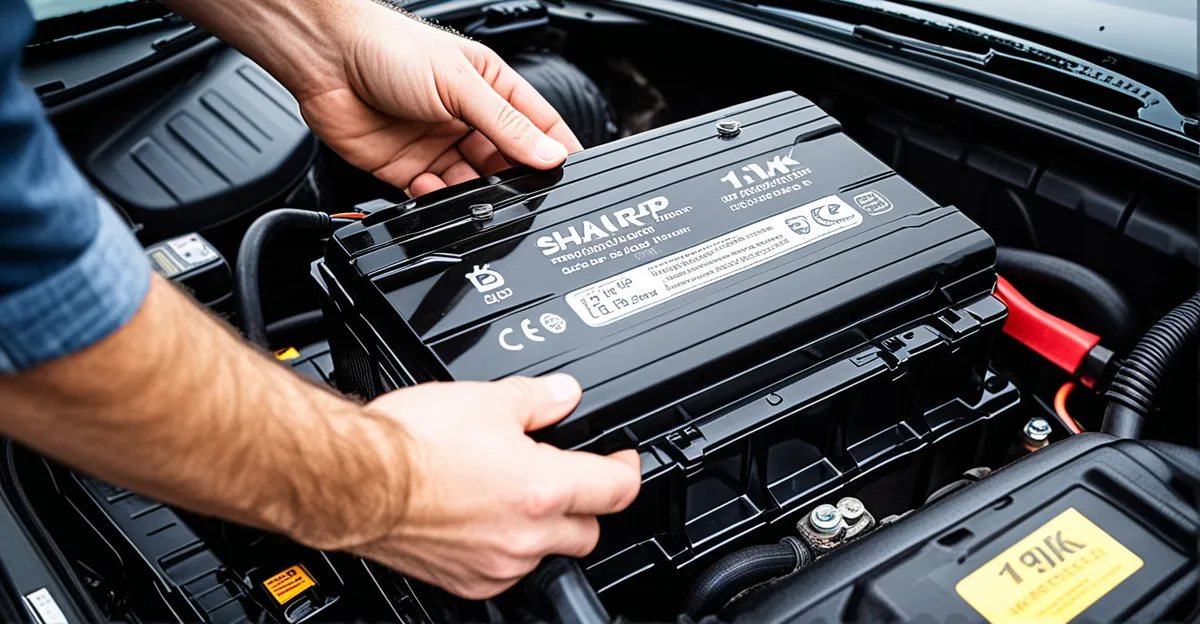
First, prepare your workspace by selecting a stable, well-ventilated area. Gather essential tools such as a wrench, gloves, and safety goggles. These items ensure a safe and smooth process. Next, before touching the battery, disconnect the negative terminal to prevent electrical shorts. Then, remove the positive terminal. Carefully detach any securing clamps or brackets holding the old battery in place.
Also read : Essential Guide to Neon Underglow Lighting for Cars in the UK: Key Tips and Insights!
When handling the old battery, avoid tipping it to prevent acid spills, a common hazard. Place it on a non-conductive surface while preparing to install the new battery. Position the new battery correctly in the tray, ensuring terminals align properly. Secure it firmly with clamps to prevent movement during driving.
Finally, reconnect the terminals, starting with the positive then the negative, and test the car’s electrical systems. This systematic approach ensures a safe and effective DIY car battery replacement UK guide experience.
Also to discover : The Definitive Handbook for Safely Installing Rear-Facing Baby Car Seats in UK Vehicles
Safety Precautions and Best Practices
Ensuring car battery safety is crucial during any DIY car battery replacement. The primary risks include acid spills, which can cause serious burns, and electrical shock if terminals are mishandled. To mitigate these hazards, always wear appropriate personal protective equipment such as gloves and safety goggles. These protect skin and eyes from corrosive battery acid and accidental sparks.
Proper attire is equally important. Avoid loose clothing or metal jewelry that could accidentally contact battery terminals, causing short circuits. When handling batteries, never use metal tools near terminals, and disconnect the negative terminal first to reduce shock risk.
Key do’s include working in a well-ventilated area and carefully placing the battery on a stable surface to prevent tipping. Don’ts include smoking or generating sparks nearby, as batteries emit flammable gases. Always inspect cables and connectors for corrosion; clean them gently if needed before reinstalling.
By following these safety guidelines, you reduce injury risk and ensure a secure, effective battery replacement task every time.
Step-by-Step Car Battery Replacement Guide in the UK
Replacing a car battery yourself starts with thorough preparation. Begin by gathering essential tools: a wrench, gloves, safety goggles, and optionally, a battery terminal cleaner. Set up your workspace in a stable, well-ventilated area to reduce risks and improve comfort during the DIY car battery replacement.
To safely remove the old battery, first disconnect the negative terminal to minimise electrical hazards. Then, carefully disconnect the positive terminal. Avoid touching both terminals simultaneously or using metal tools near live terminals. Handle the battery upright to prevent acid leaks and place it on a secure, non-conductive surface. This careful handling minimises hazards like acid spills or shocks.
When installing the new battery, ensure it fits snugly in the battery tray with terminals correctly oriented—positive to positive, negative to negative. Secure the battery firmly using clamps or brackets to prevent movement while driving. Finally, reconnect terminals in reverse order: positive first, then negative. Test the vehicle’s electrical systems promptly to confirm functionality. Following these step-by-step instructions within this UK guide ensures a safe, effective DIY car battery replacement.
Step-by-Step Car Battery Replacement Guide in the UK
After preparing your workspace and gathering tools, focus on safely removing the old battery. Begin by disconnecting the negative terminal first; this reduces the risk of electrical shock and short circuits. Then proceed to disconnect the positive terminal. Use insulated tools to prevent accidental contact with metal parts. Avoid tilting or shaking the battery, as it contains corrosive acid which can spill and cause injury.
When installing the new battery, place it carefully in the battery tray, ensuring the terminals align correctly with the car’s wiring—positive to positive, negative to negative. Secure the battery using the original clamps or brackets to avoid movement while driving. Improper securing can lead to connection failures or battery damage.
Finally, reconnect the terminals in the reverse order—start with the positive terminal and finish with the negative. This step-by-step instruction ensures electrical safety and proper function. Once connected, test the vehicle’s electrical systems, including lights and ignition, to confirm successful installation. Following this UK guide for DIY car battery replacement helps you complete the job safely and confidently.
Step-by-Step Car Battery Replacement Guide in the UK
Preparation is the foundation of a successful DIY car battery replacement. Begin by assembling essential tools such as a wrench, insulated gloves, and safety goggles. Set up your workspace in a stable, well-ventilated area to reduce risks like acid spills and fumes. Wearing appropriate personal protective equipment supports safe handling throughout the process.
When removing the old battery, follow precise step-by-step instructions to prevent accidents. Always disconnect the negative terminal first to avoid short circuits, then proceed to the positive terminal. Carefully lift the battery upright, avoiding tilting that might cause acid leaks. Place the old battery on a non-conductive surface to minimise hazards.
To install the new battery, position it firmly within the battery tray, ensuring that the terminals align correctly—positive to positive, negative to negative. Secure it using original clamps or brackets to prevent movement. Finally, reconnect the terminals in the reverse order, starting with positive then negative. Test all electrical systems to confirm full functionality. These clear steps in the UK guide provide a safe, efficient path to replacing your battery yourself.
Step-by-Step Car Battery Replacement Guide in the UK
A successful DIY car battery replacement begins with thorough preparation. Essential tools include a wrench, insulated gloves, and safety goggles. Setting up a stable, well-ventilated workspace reduces risks like acid spills and hazardous fumes. Use this UK guide to ensure you have all necessary equipment before starting.
Removing the old battery safely involves disconnecting the negative terminal first, then the positive, using insulated tools to prevent electrical shock. Handle the battery upright to avoid acid leaks and place it on a non-conductive surface. These step-by-step instructions minimise injury risks and protect both you and your vehicle.
Installing the new battery requires careful placement in the tray, ensuring terminal polarity matches—positive to positive and negative to negative. Secure it firmly with the original clamps or brackets to prevent movement. Reconnect terminals starting with positive, then negative. Finally, test the vehicle’s electrical systems to confirm full functionality.
Following these precise step-by-step instructions in the UK guide ensures your DIY car battery replacement is safe, effective, and reliable every time.
Step-by-Step Car Battery Replacement Guide in the UK
For a successful DIY car battery replacement, thorough preparation is essential. Equip yourself with a wrench, insulated gloves, and safety goggles. Set up your workspace in a stable, well-ventilated area to minimise risks like acid spills and fumes. This careful setup is the first step described in most UK guides.
Begin the removal process by disconnecting the negative terminal first; this step reduces the chance of short circuits or electric shock. Then carefully remove the positive terminal. Using insulated tools throughout these step-by-step instructions enhances safety. Always handle the old battery upright, avoiding tipping to prevent acid leaks. Place it on a non-conductive surface away from metal objects.
When installing the replacement battery, ensure the terminals match car wiring: positive to positive, negative to negative. Firmly secure the battery with the original clamps or brackets to prevent movement during driving, which could cause damage or connection issues. Reconnect terminals in reverse order, positive first, then negative. Finally, test the vehicle’s electrical system, including lights and ignition, to confirm the battery is functioning correctly.
Following these detailed UK guide steps ensures your DIY car battery replacement is safe, reliable, and efficient every time.